Developing on a remote machine
The Zulip developer environment works well on remote virtual machines. This can be a good alternative for those with poor network connectivity or who have limited storage/memory on their local machines.
We recommend giving the Zulip development environment its own virtual machine with at least 2GB of memory. If the Zulip development environment will be the only thing running on the remote virtual machine, we recommend installing directly. Otherwise, we recommend the Vagrant method so you can easily uninstall if you need to.
Connecting to the remote environment
The best way to connect to your server is using the command line tool ssh.
On macOS and Linux/UNIX,
sshis a part of Terminal.On Windows,
sshcomes with Bash for Git.
Open Terminal or Bash for Git, and connect with the following:
$ ssh username@host
If you have poor internet connectivity, we recommend using Mosh as it is more reliable over slow or unreliable networks.
Setting up user accounts
You will need a non-root user account with sudo privileges to set up the Zulip development environment. If you have one already, continue to the next section.
You can create a new user with sudo privileges by running the following commands as root:
You can create a
zulipdevuser by running the commandadduser zulipdev. Run through the prompts to assign a password and user information. (You can pick any username you like for this user account.)You can add the user to the sudo group by running the command
usermod -aG sudo zulipdev.Finally, you can switch to the user by running the command
su - zulipdev(or just log in to that user usingssh).
Setting up the development environment
After you have connected to your remote server, you need to install the development environment.
If the Zulip development environment will be the only thing running on the remote virtual machine, we recommend installing directly. Otherwise, we recommend the Vagrant method so you can easily uninstall if you need to.
The main difference from the standard instructions is that for a
remote development environment, and you’re not using our Digital Ocean
Droplet infrastructure (which handles EXTERNAL_HOST for you), you’ll
need to run export EXTERNAL_HOST=<REMOTE_IP>:9991 in a shell before
running run-dev (and see also the --interface='' option
documented below).
If your server has a static IP address, we recommend putting this
command in ~/.bashrc, so you don’t need to remember to run it every
time. This allows you to access Zulip running in your development
environment using a browser on another host.
Running the development server
Once you have set up the development environment, you can start up the development server with the following command in the directory where you cloned Zulip:
./tools/run-dev --interface=''
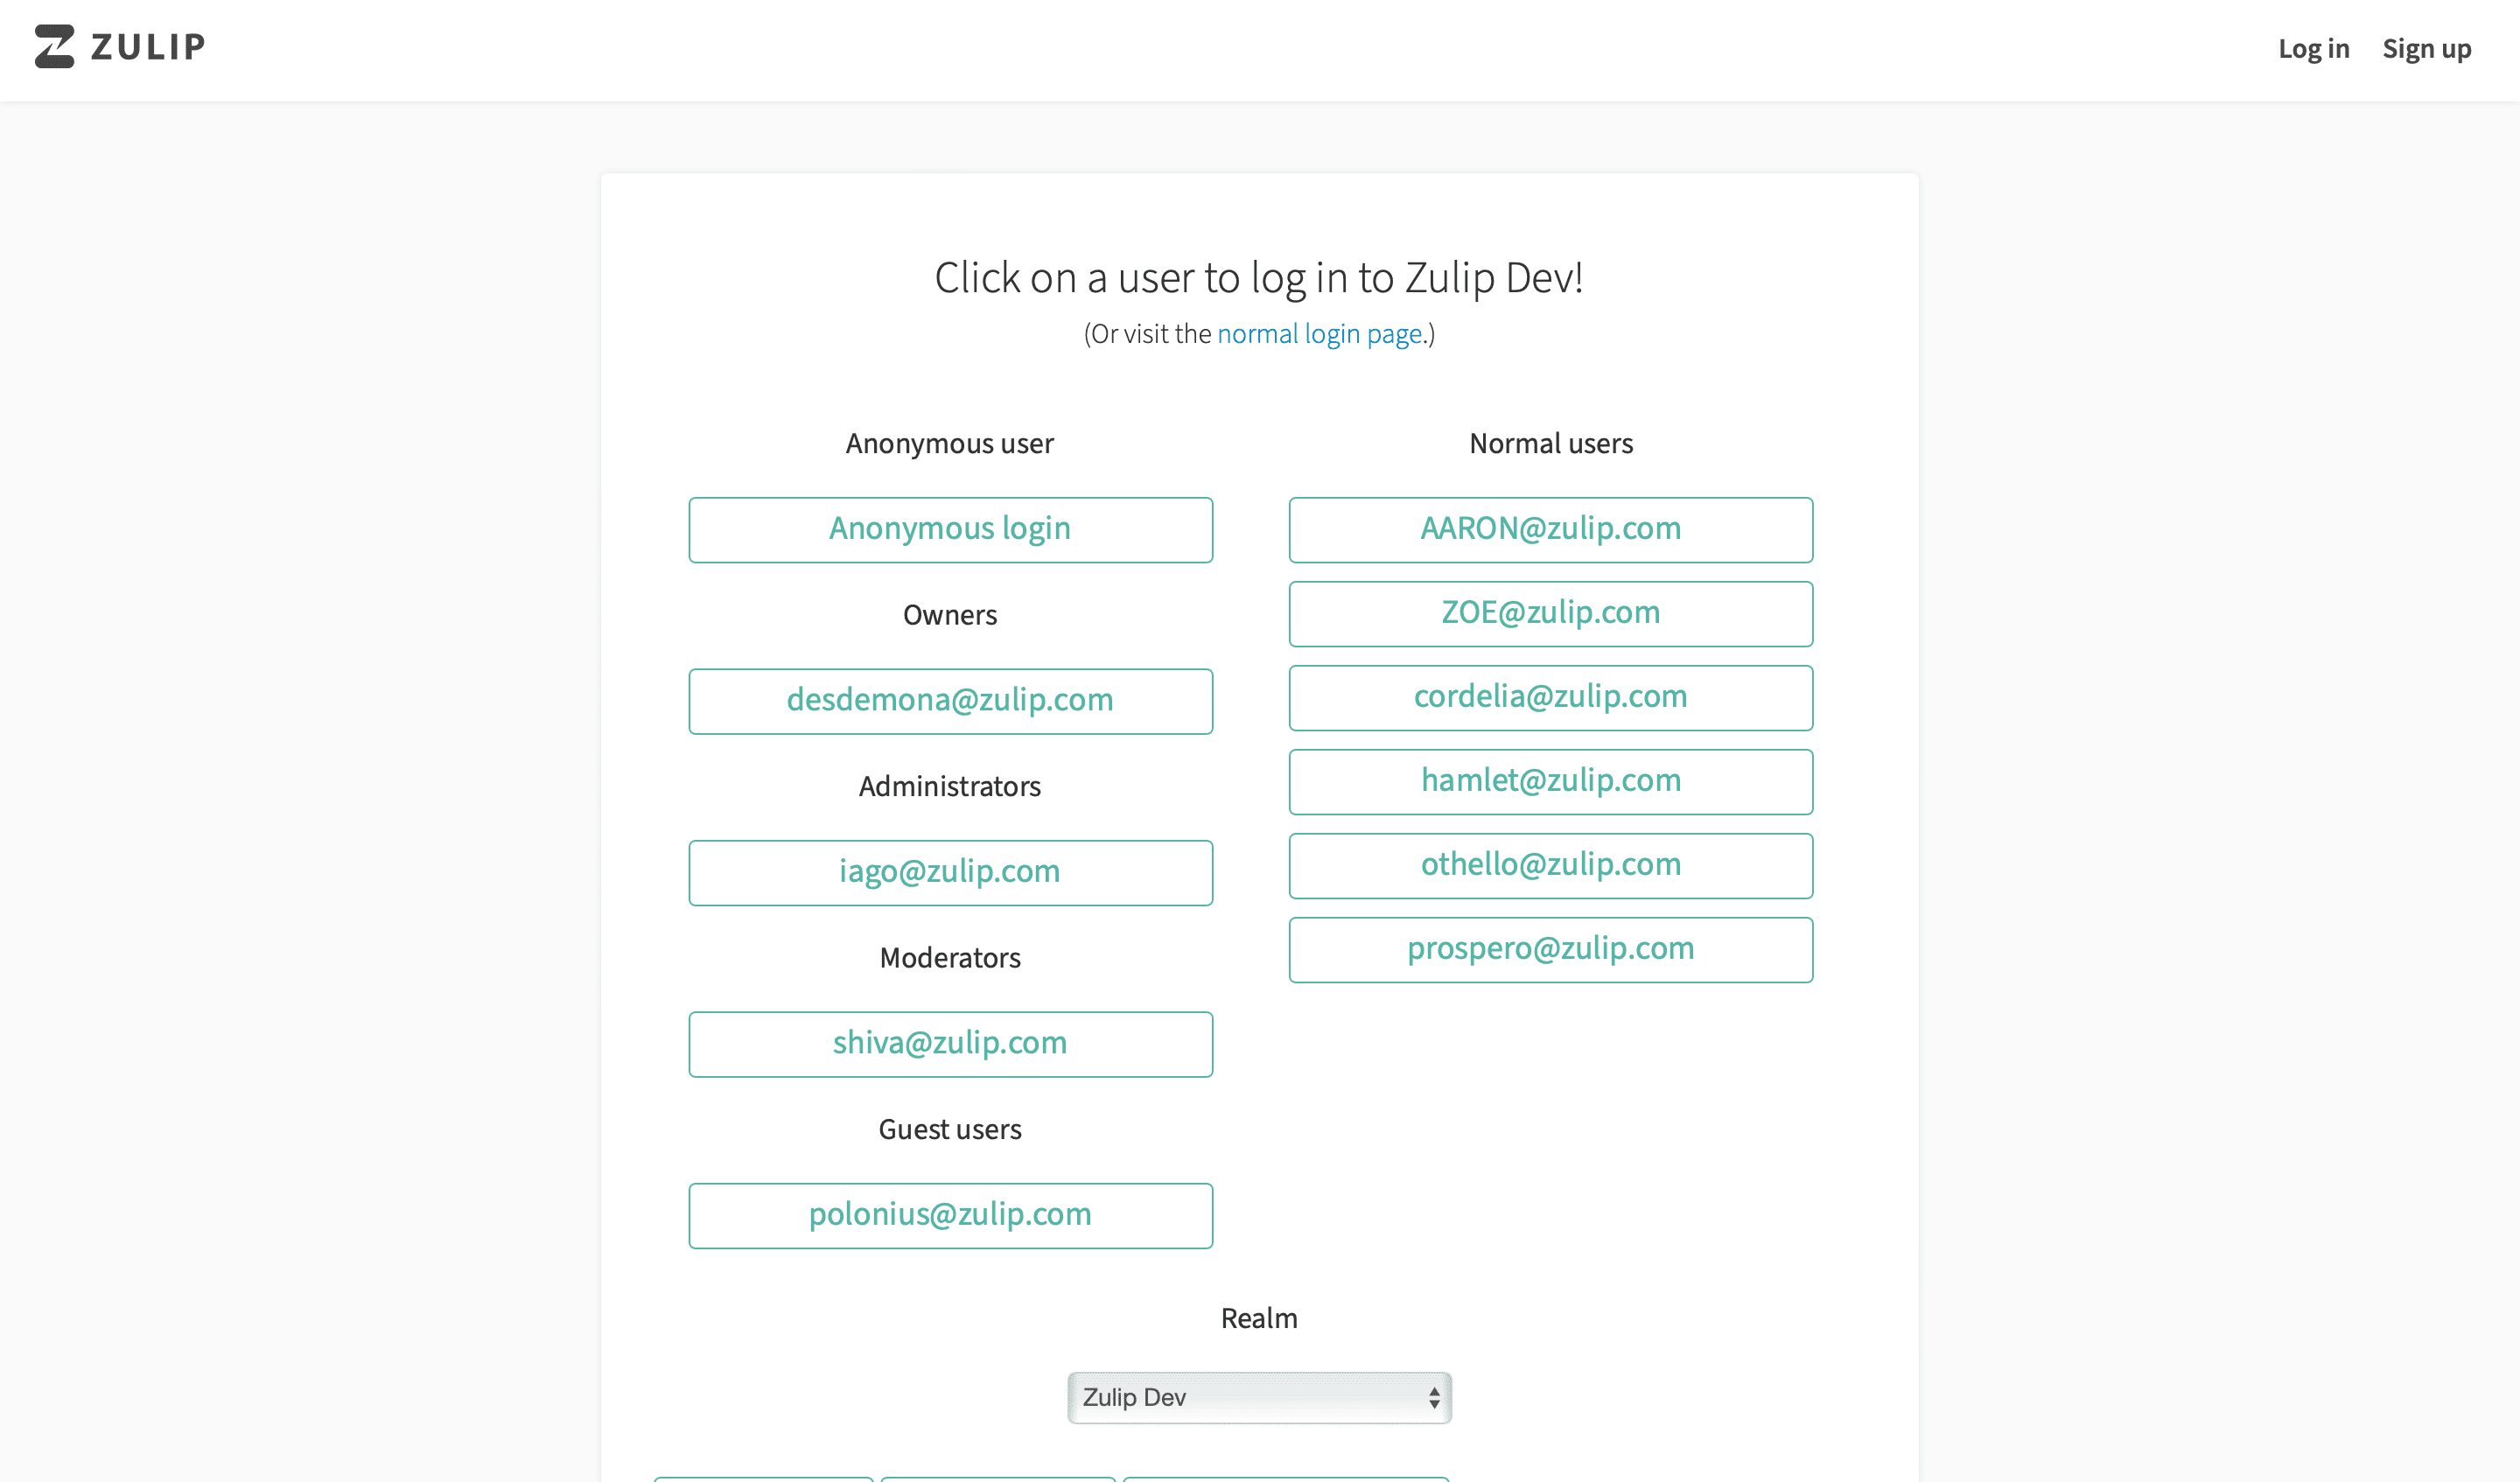
This will start up the Zulip server on port 9991. You can then
navigate to http://<REMOTE_IP>:9991/devlogin and you should see something like
this screenshot of the Zulip development environment:
The --interface='' option makes the Zulip development environment
accessible from any IP address (in contrast with the much more secure
default of only being accessible from localhost, which is great for
developing on your laptop).
To properly secure your remote development environment, you can port forward using ssh instead of running the development environment on an exposed interface. For example, if you’re running Zulip on a remote server such as a DigitalOcean Droplet or an AWS EC2 instance, you can set up port-forwarding to access Zulip by running the following command in your terminal:
ssh -L 3000:127.0.0.1:9991 <username>@<remote_server_ip> -N
Now you can access Zulip by navigating to http://127.0.0.1:3000 in
your local computer’s browser.
For more information, see Using the development environment.
Making changes to code on your remote development server
To see changes on your remote development server, you need to do one of the following:
Edit locally: Clone Zulip code to your computer and then use your favorite editor to make changes. When you want to see changes on your remote Zulip development instance, sync with Git.
Edit remotely: Edit code directly on your remote Zulip development instance using a Web-based IDE (recommended for beginners) or a command line editor, or a desktop IDE using a plugin to sync your changes to the server when you save.
Editing locally
If you want to edit code locally install your favorite text editor. If you don’t have a favorite, here are some suggestions:
Next, follow our Git and GitHub guide to clone and configure your fork of zulip on your local computer.
Once you have cloned your code locally, you can get to work.
Syncing changes
The easiest way to see your changes on your remote development server is to push them to GitHub and then fetch and merge them from the remote server.
For more detailed instructions about how to do this, see our Git & GitHub guide. In brief, the steps are as follows.
On your local computer:
Open Terminal (macOS/Linux) or Git for BASH.
Change directory to where you cloned Zulip (e.g.,
cd zulip).Use
git addandgit committo stage and commit your changes (if you haven’t already).Push your commits to GitHub with
git push origin branchname.
Be sure to replace branchname with the name of your actual feature branch.
Once git push has completed successfully, you are ready to fetch the commits
from your remote development instance:
In Terminal or Git BASH, connect to your remote development instance with
ssh user@host.Change to the zulip directory (e.g.,
cd zulip).Fetch new commits from GitHub with
git fetch origin.Change to the branch you want to work on with
git checkout branchname.Merge the new commits into your branch with
git merge origin/branchname.
Editing remotely
There are a few good ways to edit code in your remote development environment:
With a command-line editor like vim or emacs run over SSH.
With a desktop GUI editor like VS Code or Atom and a plugin for syncing your changes to the remote server.
With a web-based IDE like CodeAnywhere.
We document these options below; we recommend using whatever editor you prefer for development in general.
Desktop GUI editors
If you use TextMate, Atom, VS Code, or a similar GUI editor, tools like Visual Studio Code Remote - SSH and rmate that are designed to integrate that editor with remote development over SSH allow you to develop remotely from the comfort of your local machine.
Similar packages/extensions exist for other popular code editors as well; contributions of precise documentation for them are welcome!
VSCode Remote - SSH: Lets you use Visual Studio Code against a remote repository with a similar user experience to developing locally.
rmate for TextMate + VS Code:
Install the extension Remote VSCode.
On your remote machine, run:
$ mkdir -p ~/bin
$ curl -fL -o ~/bin/rmate https://raw.githubusercontent.com/textmate/rmate/master/bin/rmate
$ chmod a+x ~/bin/rmate
Make sure the remote server is running in VS Code (you can force-start through the Command Palette).
SSH to your remote machine using:
$ ssh -R 52698:localhost:52698 user@example.org
On your remote machine, run:
$ rmate [options] file
and the file should open up in VS Code. Any changes you make now will be saved remotely.
Command line editors
Another way to edit directly on the remote development server is with a command line text editor on the remote machine.
Two editors often available by default on Linux systems are:
Nano: A very simple, beginner-friendly editor. However, it lacks a lot of features useful for programming, such as syntax highlighting, so we only recommended it for quick edits to things like configuration files. Launch by running command
nano <filename>. Exit by pressing Ctrl-X.Vim: A very powerful editor that can take a while to learn. Launch by running
vim <filename>. Quit Vim by pressing Esc, typing:q, and then pressing Enter. Vim comes with a program to learn it calledvimtutor(just run that command to start it).
Other options include:
Web-based IDE
If you are relatively new to working on the command line, or just want to get started working quickly, we recommend web-based IDE Codeanywhere.
To set up Codeanywhere for Zulip:
Create a Codeanywhere account and log in.
Create a new SFTP-SSH project. Use Public key for authentication.
Click GET YOUR PUBLIC KEY to get the new public key that Codeanywhere generates when you create a new project. Add this public key to
~/.ssh/authorized_keyson your remote development instance.Once you’ve added the new public key to your remote development instance, click CONNECT.
Now your workspace should look similar this:

Next steps
Next, read the following to learn more about developing for Zulip:
Using an nginx reverse proxy
For some applications (e.g., developing an OAuth2 integration for
Facebook), you may need your Zulip development to have a valid SSL
certificate. While run-dev doesn’t support that, you can do this
with an nginx reverse proxy sitting in front of run-dev.
The following instructions assume you have a Zulip Droplet working and
that the user is zulipdev; edit accordingly if the situation is
different.
First, get an SSL certificate; you can use our certbot wrapper script used for production by running the following commands as root:
# apt install -y crudini
mkdir -p /var/lib/zulip/certbot-webroot/
# if nginx running this will fail and you need to run `service nginx stop`
/home/zulipdev/zulip/scripts/setup/setup-certbot \
  hostname.example.com \
  --email=username@example.com --method=standalone
Install nginx configuration:
apt install -y nginx-full
cp -a /home/zulipdev/zulip/tools/droplets/zulipdev /etc/nginx/sites-available/
ln -nsf /etc/nginx/sites-available/zulipdev /etc/nginx/sites-enabled/
nginx -t  # Verifies your nginx configuration
service nginx reload  # Actually enabled your nginx configuration
Start the Zulip development environment in HTTPS mode with the following command:
env EXTERNAL_HOST="hostname.example.com" ./tools/run-dev --behind-https-proxy --interface=''